Inside Algolia Engine 5 – Highlighting search results
Visually highlighting search results is a must-have component of a great search experience. This is especially true when you add synonyms, typo tolerance, concatenation/split of query words, and other such advanced query processing, as we presented in the third installment of this series.
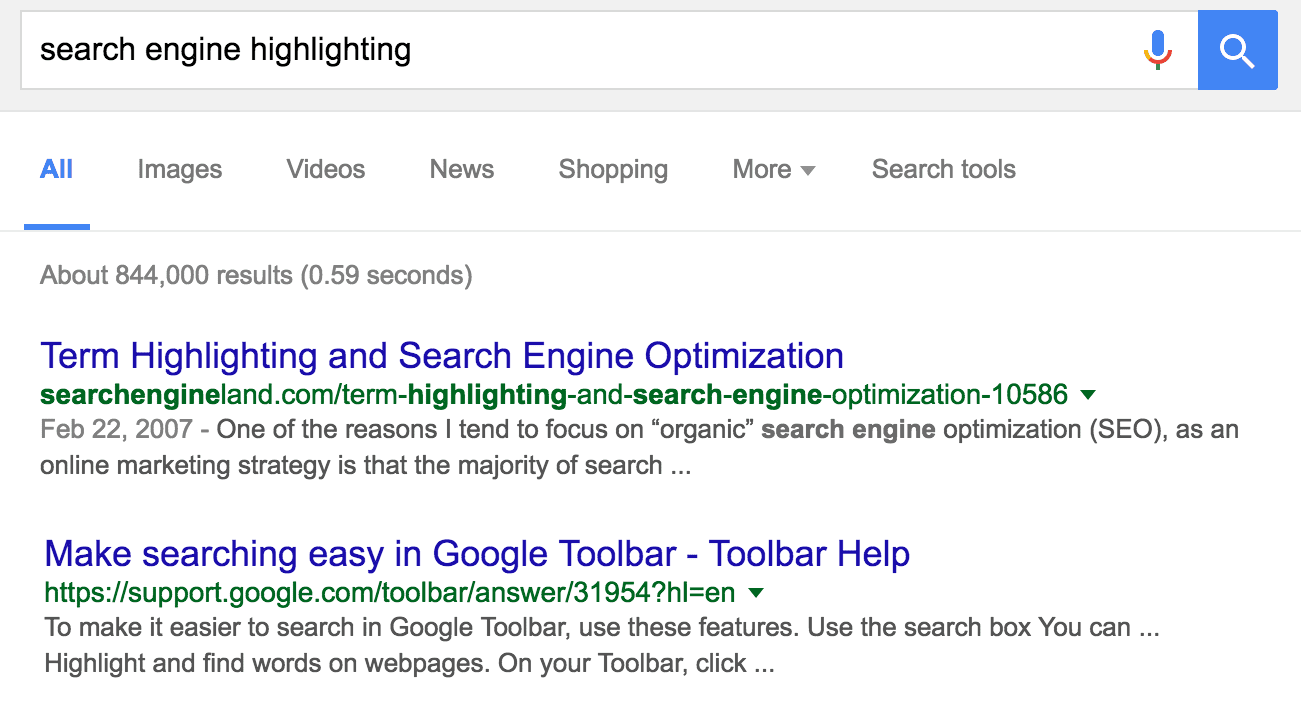
When users see results, they do not always know why a given result appears. Highlighting the matching search terms in every result makes it easy for them to check if this is the content they were looking for. In this article, we’ll show you in detail how we have implemented our highlighting.
Different approaches
Highlighting tends to be a subject that appears easy at first glance; however, the reality is much more complex, namely because it is a different process entirely than that of matching & ranking your objects. There are three main ways to implement highlighting:
- Take the query and the text to highlight and imitate the job of the search engine. This approach is partial as you don't have access to the processing done by the search engine like the extraction of synonyms. Usually this means that you just highlight the query terms, which will be misleading for users as they will not see why a record was found.
- Apply the query interpreter on the query to extract all possible extensions like synonyms and use that information to highlight a text. This approach will give you a good visual result as you will have all the alternatives. But you will have to test a lot of expressions that do not match against your text. There is a lot of waste of performance here.
- Apply the query in the search engine as usual but keep the matched terms for each result. This list of matched terms will be used by the highlighter to process a record. This approach offers the best of two worlds: you have exactly the expected highlight whereas the highlighter remains fast and only focuses on the expression that is in the record.
The big advantage of the last two approaches is that your highlighter will be easier to implement. You don’t have to worry about alternatives like synonyms or typo-tolerance as it will already be resolved by your query interpreter. In other words, if your record matches with a typo, you will have the word with a typo as an input of the highlighter.
In the Algolia engine, we have used the third approach since day one. It was actually one of the many reasons to redevelop the Algolia engine from scratch. We had already developed several highlighters in the past and we knew from experience the third approach would be the best; however, we had to to keep all matched terms for each record, which needs to be done in a very efficient way in order to not create a bottleneck in term of CPU or RAM.
Different expressions we highlight
There are four types of expression that the highlighter can highlight:
- A word: in this case, we need to find all tokens in the text to highlight that are identical to this word (with an accent and case-insensitive comparison).
- A prefix: in this case, we need to find all tokens in the text to highlight that start with this prefix (again with an accent and case-insensitive comparison). Usually, this word corresponds to the last query term that is matched as a prefix; however, it can also contain a typo (as we support typo tolerance on prefixes).
- A phrase: in this case, we need to find a sequence of words in a specific order in the record (also with an accent and case-insensitive comparison).
- A prefix phrase: identical as a phrase, except that the last word of the phrase can be matched via a prefix.
All those expressions come from the search engine and are an input for the highlighter, for example the user query "searchengine" contains only one term but will also add the alternative phrase "search engine" which is the result of our split of query tokens processing (described in the third article of this series).
Explaining the result using query terms
The highlighter is not just the process that adds some tags around matching expressions, it plays a bigger role in the user experience. You have potentially dozens of attributes in your objects used for search, displaying all of them would give too much information to the user. You only have to show the relevant one to explain the result.
For example, if you are typing the query "Twilio IPO" on your favorite news site, you will have several objects that will match. Some with both terms in the title like this one:
- Title: Twilio raises more than expected in IPO
- Content: Twilio Inc. raised more than it expected in its initial public offering, an optimistic sign for the dozens of other technology companies that have been valued at more than $1 billion in private fundraising. [...]
And some with only one term in the title like this one:
- Title: Twilio’s shares climb 92% in trading debut
- Content: Twilio Inc.’s shares nearly doubled from their initial public offering price in their first day of trading, a positive sign during a dry spell for tech IPOs. [...]
On the first one, the highlighter will give you the information that all query terms were found in the title attribute (via the `matchLevel=full`), which allows you to consider a specific display of this article in the UI as only the title is required to explain the result.
Here is the highlighter information on the title of the first article:
{"_highlightResult": {"title": {"value": "Twilio raises more than expected in IPO","matchLevel": "full","matchedWords": ["twilio","ipo"]}}}
On the second article, the highlighter will give you the information that the title attribute is partially matching the query ("matchLevel=partial").
{"_highlightResult": {"title": {"value": "Twilio’s shares climb 92% in trading debut","matchLevel": "partial","matchedWords": ["twilio"]}}}
The highlighter gives you all information needed to explain the query, you can scan all attributes in the highlighter and only select the ones that "explain" one query term that no other one explains. Most of the time, you don’t have enough room to show every title and its content, in this case the highlighter will help you to show the content only when it's relevant to explain the result. This approach of explaining search results plays a big role in user engagement and improvement of your ROI on search.

Computing a snippet
When the text of an attribute contains more than a few words like the content of a news article, you want to summarize it by keeping only the important sections. The result of this process is called a snippet and there are a lot of different approaches, so every snippet computation is different.
In Algolia, the snippet computation relies on the highlighting.
The first step of the process is to flag each token of the text to snippet with the corresponding query term that matches it. Then the second step is to find the window of N tokens that maximise the number of different query terms matched. You can have several windows of N tokens that contains the same number of highlighted terms, in this case we prefer to leave some text before and after the matching terms to give some context to the user.
Algolia lets you customize the number of words in a snippet, as this parameter depends on the UI you are building. In the example below, we will use 10 words for the description of the two articles:
{"_snippetResult": {"content": "Twilio Inc. raised more than it expected in its initial…","matchLevel": "partial"}}
{"_snippetResult": {"content": "Twilio Inc.’s shares nearly doubled from their initial public offering…","matchLevel": "partial"}}
The two snippets actually return the 10 first words of the content as there is no 10 words window that contains both terms.
You can note that we do not return matchedWords attribute in the snippet as the result is partial. You need to use the highlighter to fully explain a result but you can, of course, request to have both the highlighted version and the snippet version.
How the engine identifies matching words efficiently
Our highlighter is exhaustive while having very good performance, a big part of the hard work is actually done in the search engine itself in the identification and storage of all matched words for an object.
During the query processing, we compute all expressions to find and create a description object for each of them that contains the expression to highlight and the link to the original query token. At the end of the query processing, we have a vector with all those alternative expressions.
Then, when we create the boolean query that will be applied to the index, we keep the link to the original expression. For example if you have the query "Hotel NY" with a synonym "NY" = "New York", the expression vector would be:
0: toHighlight=hotel, queryTerm=hotel1: toHighlight=NY, queryTerm=ny2: toHighlight="New York", queryTerm=ny
We would execute the following query:
OR(AND(Word("hotel", vectorPos=0),Phrase("New York", vectorPos=2)),AND(Word("hotel", vectorPos=0),Word("NY", vectorPos=1)))
When a record matches, we know which part of the expression matched (list of integers). For example:
- A record containing "hotel" and "NY" will have a vector containing [0, 1]
- A record containing "hotel" and "new york" will have a vector containing [0, 2]
- A record containing "hotel" and "NY" and "new york" will have a vector containing [0, 1, 2]
This example is very simple as we have a very small number of expressions to match. In reality, we usually have hundreds of expressions to try because of typo tolerance and it becomes critical to identify only the one found in the record.
We finally keep this vector of integers for each result to be able to produce the list of terms to highlight and the list of matched words.
Why search without highlighting is bad
As soon as you have advanced query interpretation,highlighting becomes essential to a good user experience. Having a great experience is more than highlighting the most important attribute, it is searching and displaying all attributes that are important for the user to understand why the result was displayed. This is key to help the user quickly decide which result they will choose first. Without this aspect, you will leave your user disappointed as they will inevitably choose a bad result.
Next readings
We hope this post gives you some insight into the inner workings of our engine and how we got where we are today. As always, we would love your feedback. Definitely leave us a comment if you have any questions or ideas for the next blog in the series.
I look forward to reading your thoughts and comments on this post and continuing to explain how our engine is implemented internally. Transparency is part of our DNA! :)
We recommend reading the other posts of this series:
- Part 1 – indexing vs. search
- Part 2 – the indexing challenge of instant search
- Part 3 – query processing
- Part 4 – Textual Relevance
- Part 5 – Highlighting, a Cornerstone of Search UX
- Part 6 – Handling Synonyms the Right Way
- Part 7 – Better relevance via dedup at query time
- Part 8 – Handling Advanced Search Use Cases
Other links: